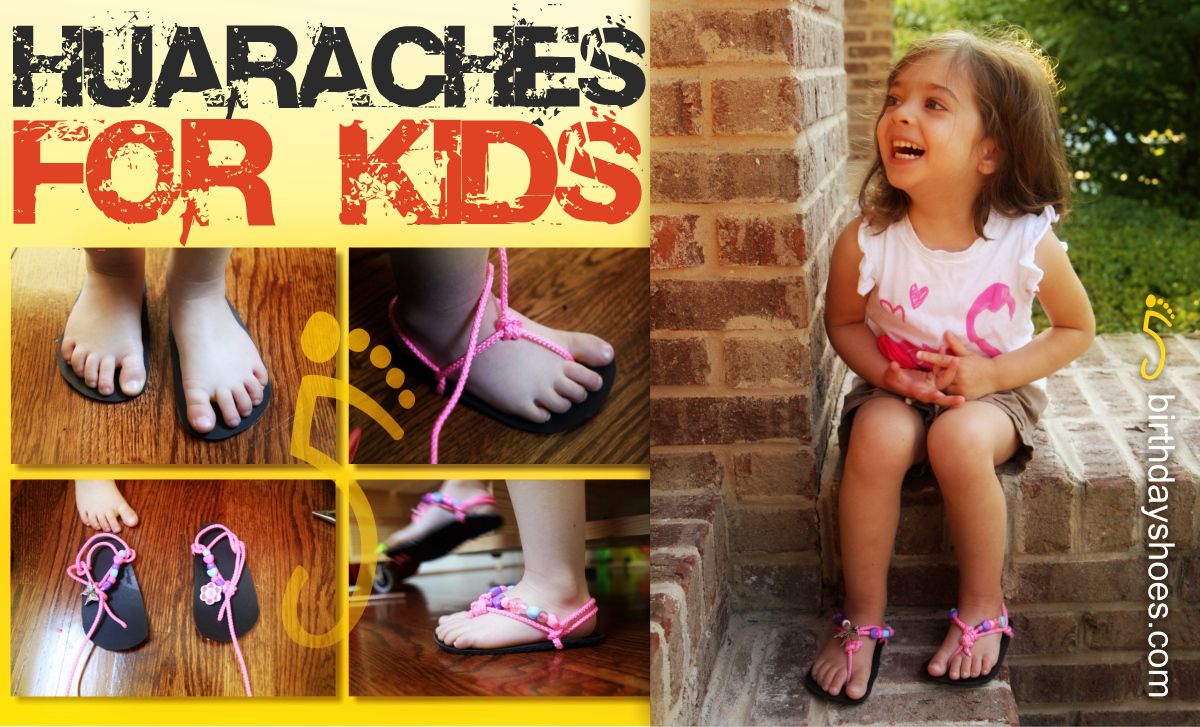
Kids Huaraches Review (And How to Make Kids Minimalist Sandals)
A full review of huaraches for your kid - a three year old girl in this case - as well as how to instructions to make your own minimalist sandals using Xero Shoes do-it-yourself huaraches kit!
Finding healthy shoes and sandals for kids is incredibly frustrating.
Sure, those floppy leather-soled kid's moccasins are easy enough to pick up for your tiny-footed toddler — you know, like Robeez or, of course, Soft Star Shoes (BirthdayShoes' favorite for both kids and adults). But past the age of 18 to 24 months, foot-minded options for children seem to disappear.
As a parent of two little girls — an almost 3 year-old and a 7 month-old — my reckoning of children's footwear is that healthy shoe options for growing feet are (quite literally) hard to come by. Seems most shoe manufacturers simply take their thickly cushioned, heavy, foot-constricting sneaker designs (those made for adults who've been wearing clunky shoes for decades) and shrink them into miniature versions for toddlers and young children.
Any parent will tell you that a child's foot is both flexible and wide, with toes that seem to have minds of their own as they splay, grasp, and stretch all over the place. A child's foot hasn't been subjected to years of confinement in small-toe-boxed shoes. Thus, it's perplexing that so many shoe manufacturers put out footwear for kids that restricts the foot to a narrow toe-box and a narrow range of motion — not to mention the added weight of an overbuilt shoe.
What's a parent to do? Well, I'm happy to say that I've found one option that is a real winner — at least so long as you've got decently warm weather. That option is Xero Shoes huaraches sandals — built custom by you — with the help of your favorite little helper, of course—in fact, you couldn't do it without them!
What follows is a review of Xero Shoes huaraches from a parent's perspective but also a little video review by the one with the most important opinion (so she thinks) — my cute little minion daughter. And I'll also explain how I made the huaraches with her help. Read on!
Xero Shoes Huaraches for Kids Review
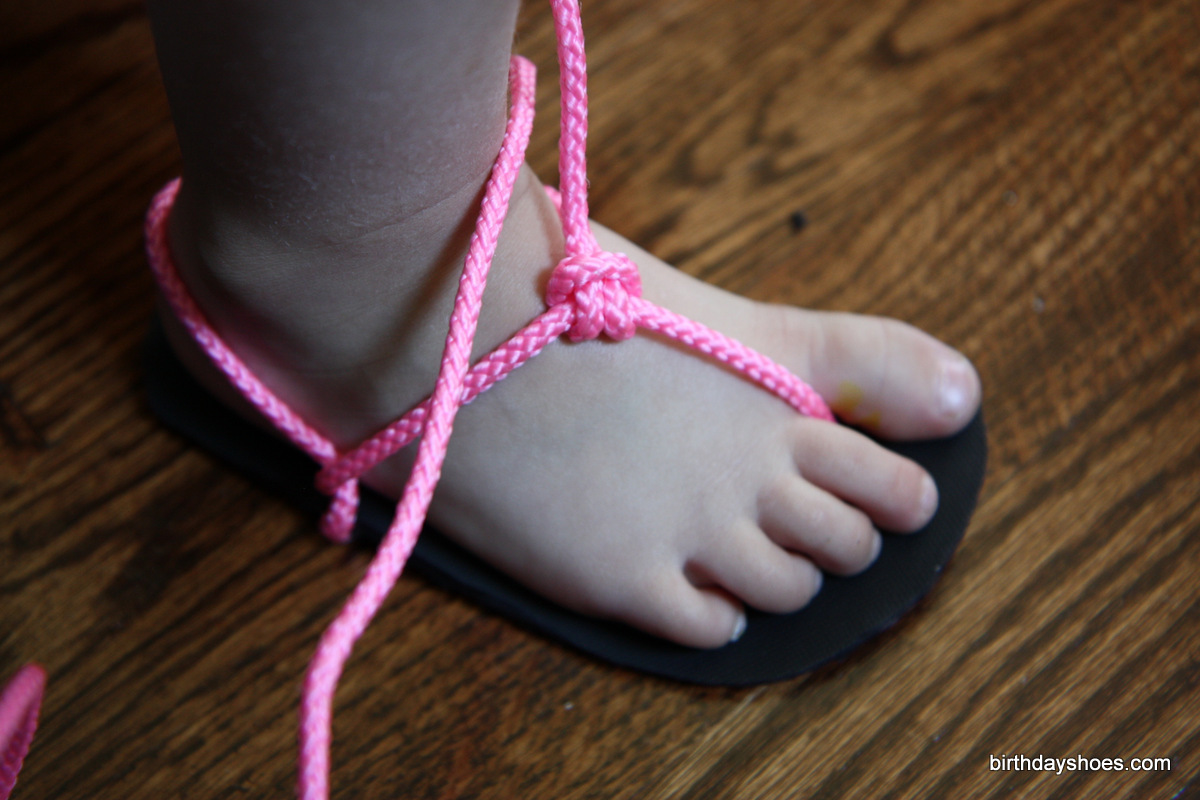
My daughter Aviana — she's almost three years old here — shows off her "la-latch-es" (huaraches) sandals
Overview
Huaraches (Spanish for "sandals") are little more than a sole (made of leather, Vibram rubber, an old tire, carpet, whatever) cut to the outline of your foot and then attached to your foot by three cleverly punched holes, a lace (nylon, leather, hemp, whatever!), and a variety of tying/lashing styles ranging from a "slip on" version (what you'll see today) to a full-blown, up the ankle gladiator style.
You'll further recall that huaraches have seen a huge surge in popularity due to the smash-hit book Born to Run by Chris McDougall. You see, huaraches are the Nikes of the the Copper Canyon-running Tarahumara Indians. These are the native Mexicans run miles and miles wearing old tires strapped to their feet. It was in Born to Run that we learned how "Barefoot Ted" McDonald learned to tie huaraches from Tarahumaran Manual Luna*.
We've reviewed a number of huaraches sandals (or huaraches-inspired minimalist sandals) previously and I recently did a full blown review of the Xero Shoes huaraches in both their 4mm thick Connect and 6mm Contact models. If that's not enough to whet your appetite for huaraches, just peruse all our coverage of them here.
Huaraches for the Active Kid
Huaraches have typically been looked at as adult footwear or barefoot-style running footwear. But could they be worn by kids? What about kid's sizes? Aren't those laces complicated?
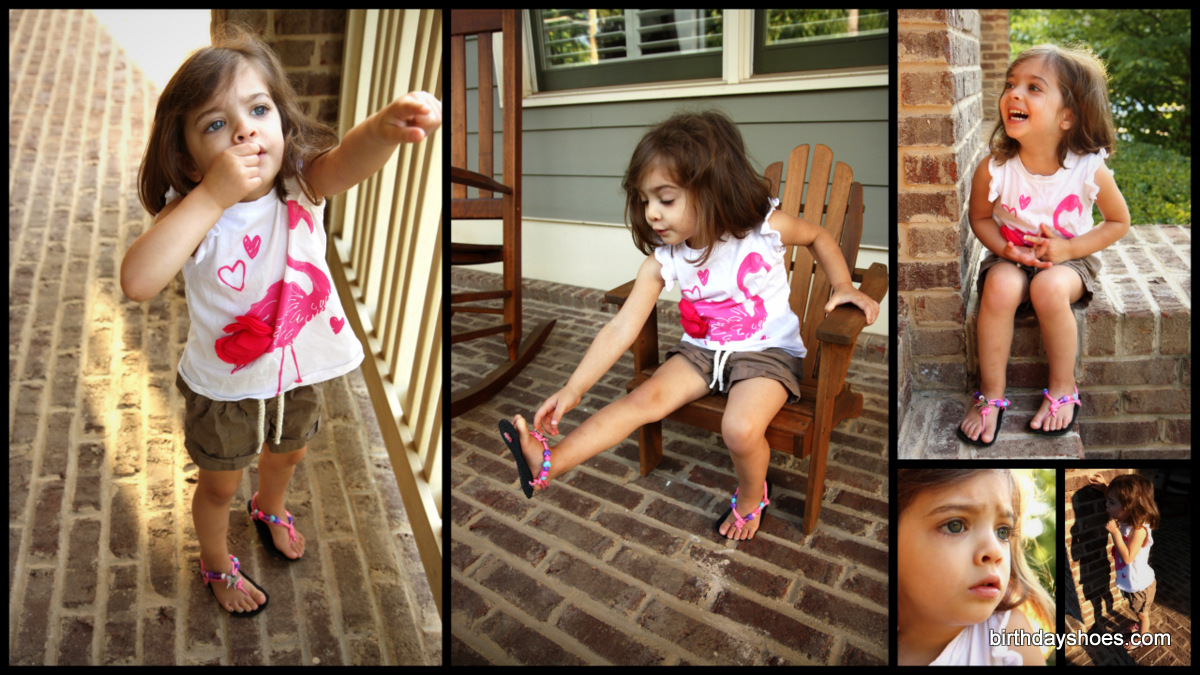
Well, let's start at the end with a review — if you can call it that — from my almost-three year-old daughter Aviana ("Avi" like the letter "a" "vee"):
Nevermind she can't actually say "huaraches" (I mean, really, who can?), I wanted to start with this little video (Avi and I shot it in a single take) because it shows that Avi both likes her "luh-la-chez" and that she can take them off and put them back on by herself (that bit wasn't planned, though that will come as no surprise to any parent of a 3 year-old as they don't care much for plans!).
For some three year old action in huaraches, you can cruise along as Avi plays on a few nearby playground sets, scaling walls, ladders, and rocks in her sandals:
Pros
What makes huaraches — and specifically Xero Shoes' variety of huaraches — such a great choice in footwear for our little kids is that they do a few things amazingly well.
- Provide a maximum amount of toe splay. With no toe box to confine the width of the foot, a kid's foot is free to spread out, grow, and flex in whatever way required. This is, of course, a hallmark benefit of the huaraches design.
- Are bio-mechanically neutral. Without any arch support and no cushy, elevated heels, a kid can run, walk, climb, play, or do whatever effectively the same way as they would barefoot.
- Keep kids surefooted and grounded. This is just due to having such a thin, 4mm sole. Ground feel is incredible in these (I speak from my own experience with the adult 4mm Connect Xero Shoes).
- Are relatively inexpensive. A DIY kit from Invisi costs $20 in a little kid's size (link). You can pick up kid's shoes at Walmart on the cheap, but I'm amazed how expensive shoes are for kids. If memory serves, a pair of kid's Crocs are $20-$30.
Cons
As for drawbacks, as great as Xero Shoes huaraches are for kids, their shortcomings are pretty much the same as with all huaraches:
- The laces! If there was one challenge in getting Avi's huaraches "just right," it was in dialing in her laces so that they had the right tension on her feet. On my first couple tying attempts, one heel strap would slide down too easily, which would undermine the entire sandal staying on her foot. This meant that shoe would keep falling off, and since she was new to wearing them, she hadn't learned to put them back on herself. Observed the problem, tightened the lacing to get it right, and haven't had an issue in the weeks since. In other words, once I dialed in the "slip on" huaraches tying method, I've yet to have to adjust her sandals again.
- That dangly front bit of sole past the thong. This is the bit of sole that extends past the knot that runs between the two biggest toes on each sandal. As your toes point up, dorsiflexing, this bit of sole hangs below the sole. Xero Shoes make up for this with a very slight amount of toe spring. However, this dangly sole could snag on something and cause a kid (or adult) to trip. It doesn't seem to have happened with Avi, but I keep an eye out for it. That little bit of toe spring helps a lot.
- There is a knot 'tween your biggest two toes under the sole. I'm listing this as a drawback even though it's not actually been an issue for Avi (nor has it been an issue for me). I just know people worry about that knot underfoot (don't).
- They are sandals, so you need a warmer climate to wear them. While water isn't really an issue for Xero Shoes huaraches due to the nylon not expanding or shrinking much, if any, when wet, you obviously can't have your kid wearing ultra minimalist sandals below certain temperatures. Sorta goes without saying, but it's a drawback.
Overall
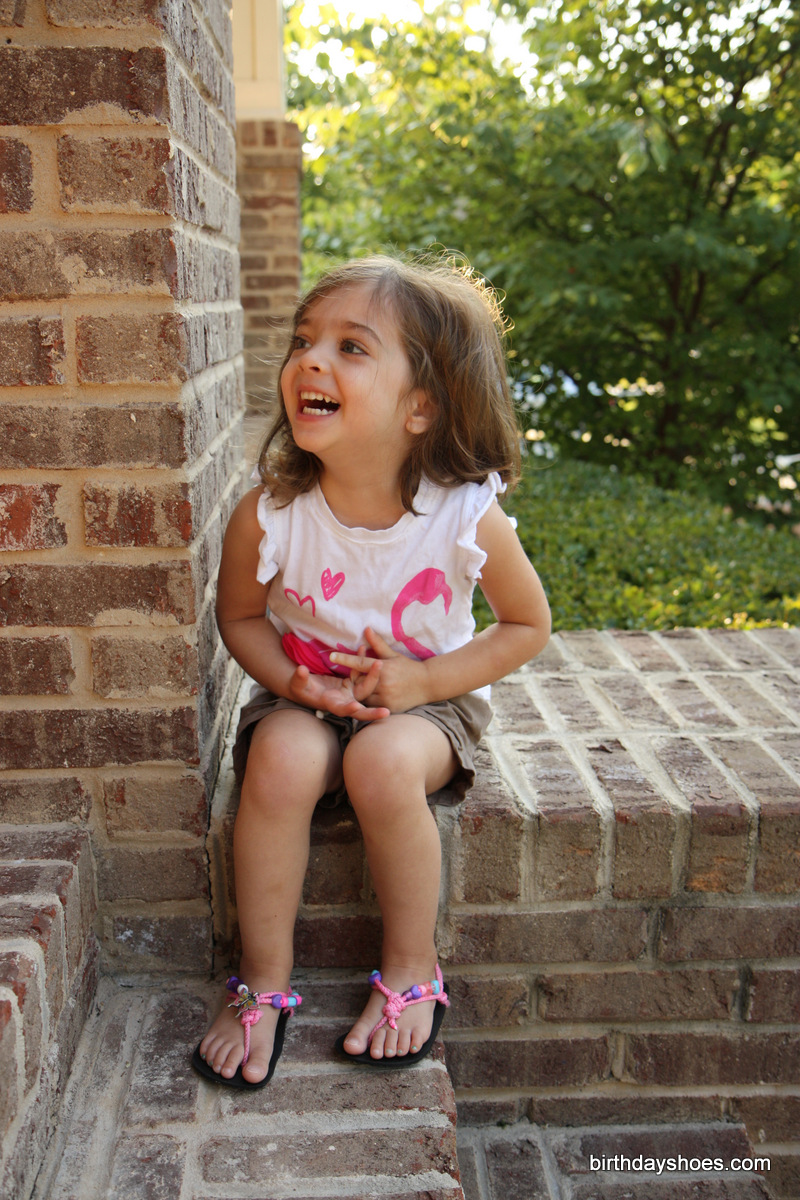
Xero Shoes cut for a kid make for an awesome summer sandal. If you wear these as an adult, this will come as no surprise. They're just such a minimalist sandal that they air amazingly, you usually forget you have them on, and they just work.
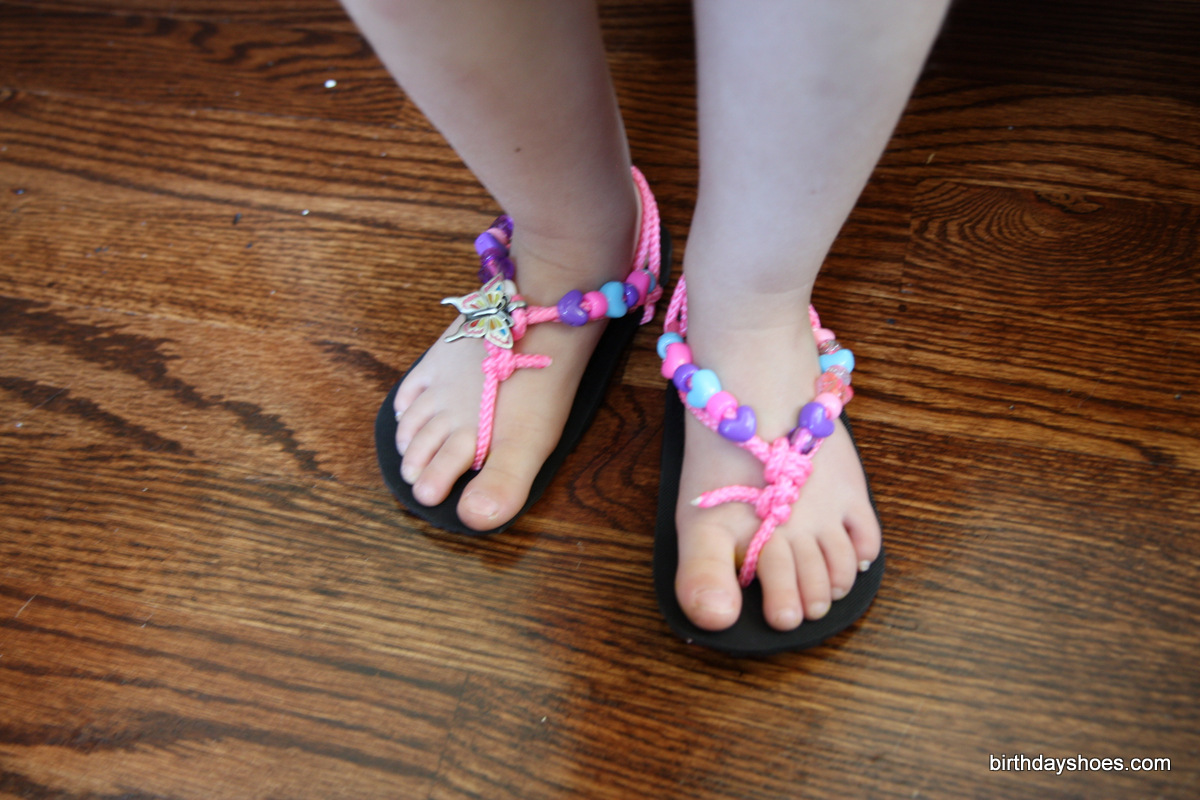
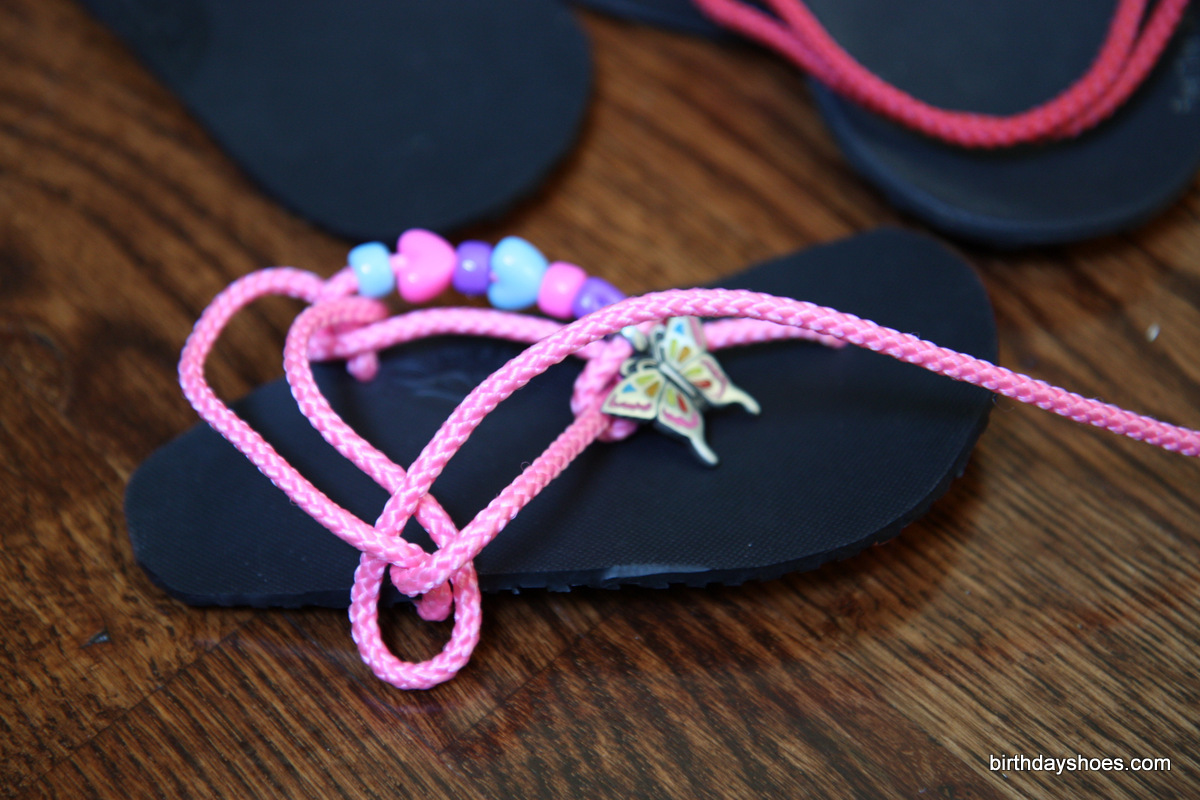
But even better, as you see from these photos below, the Xero Shoes can be tricked out with beads and charms to make them even more fun. I get comments from Avi's daycare teachers (and other folks at daycare) all the time about them. People want to know what they are, where to get them, etc. The same goes for public parks. There's just something intuitively awesome about a kid wearing huaraches sandals that people seem to get when they see them in action.
Here's Avi modeling her homemade pair (and me modeling my adult Contacts — the 6mm versions I reviewed here)
In short, these are by far the best footwear I've found to date for Avi to wear in the Spring and Summer. I'm also happy that when she grows out of them, I'll be able to get some new laces and just rebuild them for my younger daughter's feet once she's old enough to fit the sole, which I'm sure will far outlast my daughter's ability to wear them as her feet grow.
Now, if you're interested in huaraches for your kid, I know what you're probably thinking: but how do you make them? Isn't that complicated? Well, yes and no. It's definitely intimidating to make huaraches from scratch, but there is a huge amount of information and how-to available on the web. Viewed as a fun project to kill an hour on a Sunday afternoon with your kiddo and you'll soon realize how great making huaraches can be.
And when it's done and parent after parent asks you about the sandals and you get to say "yeah I made them!" Well, that's just priceless.
Read on for some step-by-step photos of me making huaraches for my three year old girl, or if you're already ready to take the leap, order your kit and come back when you're ready to go.
Note: Avi's huaraches were made from a 4mm Connect sole (the thicker sole is the 6mm Contact). While I actually prefer the added rigidity through the midfoot provided by the 6mm sole for adult-sized feet (and don't mind the meager loss in ground feel), for smaller kid feet the more flexible 4mm Connect sole seems to work wonderfully well, so why not save the $5? That's my take anyway.
How to Make Huaraches for Your Kid

What follows is a little step by step on how Avi and I made her three-year-old sized huaraches. While not required, it probably makes sense to have some working knowledge of huaraches lacing, and how the sandals function based off of tension between the sole, the lace, and your foot.
If you already have a pair of huaraches, this is going to be easier because you'll have experience and a bit of intuition. For that matter, I highly recommend snagging your own Xero Shoes and building a pair yourself or having a custom pair made so you can see how the "pros" do it. If you are wanting to get a pair for yourself and your kid at the same time, perhaps just get a custom pair for you and DIY your kids. Or DIY both but try your hand at making your own first in advance of making your kid's pair. This will likely make the whole process seem old-hat. If you want to DIY your own pair, the following kid's instructions work just as well for adults.
Before you get going, you're obviously going to need the raw materials. My daughter wears size 6/7 and Xero Shoes simply sent me the smallest kit they had in the Connect 4mm sole, which is the "A" which fits up to 6 3/4" (or 17cm) long feet. I also got pink nylon for the laces. You can get really fancy with beads and add charms/pendants fairly inexpensively (for the kid stuff). For a bit over $30 you can have beads and a charm and the kit shipped to you. Alternatively, grab just the kit (sole, laces, and hole punch) and find beads, etc. at your local hobby store.
Other things you'll need include a black Sharpie (or other sort of marker), a pen, some paper, some scissors (kitchen shears recommended), a lighter (!), a bobby pin or two (comes with the kit), a leather punch (comes with the kit), and some needle-nose pliers.
Once you've got it all in hand and a willing little helper to work with, you're ready to begin!
Step 1: Tracing and Cutting the Soles
- Have your kid stand on a piece of paper. Trace around their foot with a pencil or pen held perpendicular to the floor. Do this for both feet.
- Smooth out your tracings into the shape of a sole. You can add a little play/extra room if you like (You can always trim more later, but you can't undo what you cut!).
- Cut out the tracings! Note that in the case of very small-footed kids, the pre-punched holes that straddle the ankle in the Xero Shoes FeelTrue sole won't work — you'll have to trim to size the entire sole based on your tracing, which will likely result in the loss of these holes.
- Lay your foot tracing over each sole (left and right) and trim off all the excess. I used kitchen shears to do this cutting and they worked incredibly well.
- Have you kid stand on your new soles! Take a marker and put a dot between the two biggest toes right in front of the webbing and "slightly closer to the 2nd toe" (not your big toe). This is a consideration for runners per Xero's official how-to instructions.
- Mark the ankle holes — here you take the marker and put a dot on either side of your kid's ankle. Place the perpendicular marker just in front of the protruding ankle bone of your kid. You can sorta use the FeelTrue pre-punched holes as placement guidelines.
Step 2: Punching the Holes
Note that to punch the holes, Xero Shoes now sends you a 4mm leather hole punch free with your DIY kit! This works the same as a leather punch tool like what you see in these photos, you just need a hammer to "punch" the holes through the soles (taking care not to punch a hole through whatever surface lies beneath — put wood or a magazine under the sole).
Now that you have your soles cut, your holes marked, and your punch in hand, simply take your punch and press it hard (hammer or lots of consistent pressure like you're pushing on a nail) on each dot you marked in the prior steps. This will create three small holes per sole that will be used to get your lacing done!
Step 3: The Figure-8, All-Important Knot
- Huaraches all start with a knot underfoot. So here's where you'll need those needle nose pliers and the supplied bobby. Take the end of a lace and put it between a bobby pin (towards the base of the pin, not the opening).
- Push the two heads of the bobby pin through the hole (from the top of the sole through to the bottom) that goes between your toes. Once the bobby pin is through, you'll find that getting the nylon lace through, as doubled over, requires some strength. This is where you can pinch the pin with your pliers and pull hard! Your bobby pin will hate this, but it'll get the job done.
- Now you have to make a knot. The preferred knot is the "Figure 8 knot," which if you climb, you'll be an expert at making already. Otherwise, just try and follow along with the photos above.
- Note that Xero recommends you can make the knot less large for kids by removing the inner white core nylon before creating the knot. I didn't do this and it hasn't been a big problem. Up to you (and a bit on that white core below).
- Once your Figure-8 is made, you take your lighter and do some slight melting on your knot. Then compress the knot using your needle nose pliers. This will make the knot somewhat solid, making it highly unlikely to come undone.
- You can trim off any excess lace past the end of the knot and then melt off that end to reduce fraying.
- Repeat for the other sole.
Step 4: Lacing and Beading!
- Lacing! Now the fun part begins. So you're going to now take your lace and pull it all the way so that your Fig-8 knot is flush against the bottom of the sole.
- Then, you're going to go over to the outside ankle hole. If this is the right foot, you're going from the toe knot hole at the 12 o'clock position over to the 3 o'clock position (the 6 o'clock has no hole — it's your heel). Again using your bobby pin and needle nose pliers, get that lace through the hole from top of the sole to the bottom.
- Once through the outermost hole, wrap the lace up and around to create a "twist."
- Now take the lace around the heel over to the 9 o'clock hole. Again from top to bottom with your bobby pin and pliers, pull that sucker through the inside ankle hole.
- Wrap it around the lace again, taking the lace back towards the center (the 12 o'clock position).
- Now you want to "knot" at the top of your kid's foot. I don't know what this knot is called, but take a look at the second photo above and you'll see what you want to do.
- If you have a charm or pendant or beads, go ahead and get those out.
- In order to thread the nylon through any beads, etc., it helps to make the thread into a point. There's a neat trick to do this.
- You start by pulling the nylon cord casing (the pink in this case) down off the inner core, white thread.
- Cut off some of this thread (maybe a half inch?) and then pull the pink casing back forward.
- Using your lighter, heat the end slightly (not too much!).
- Use your fingers to quickly "sharpen" the thread into a point.
- See the pictures above to help conceptualize the result!
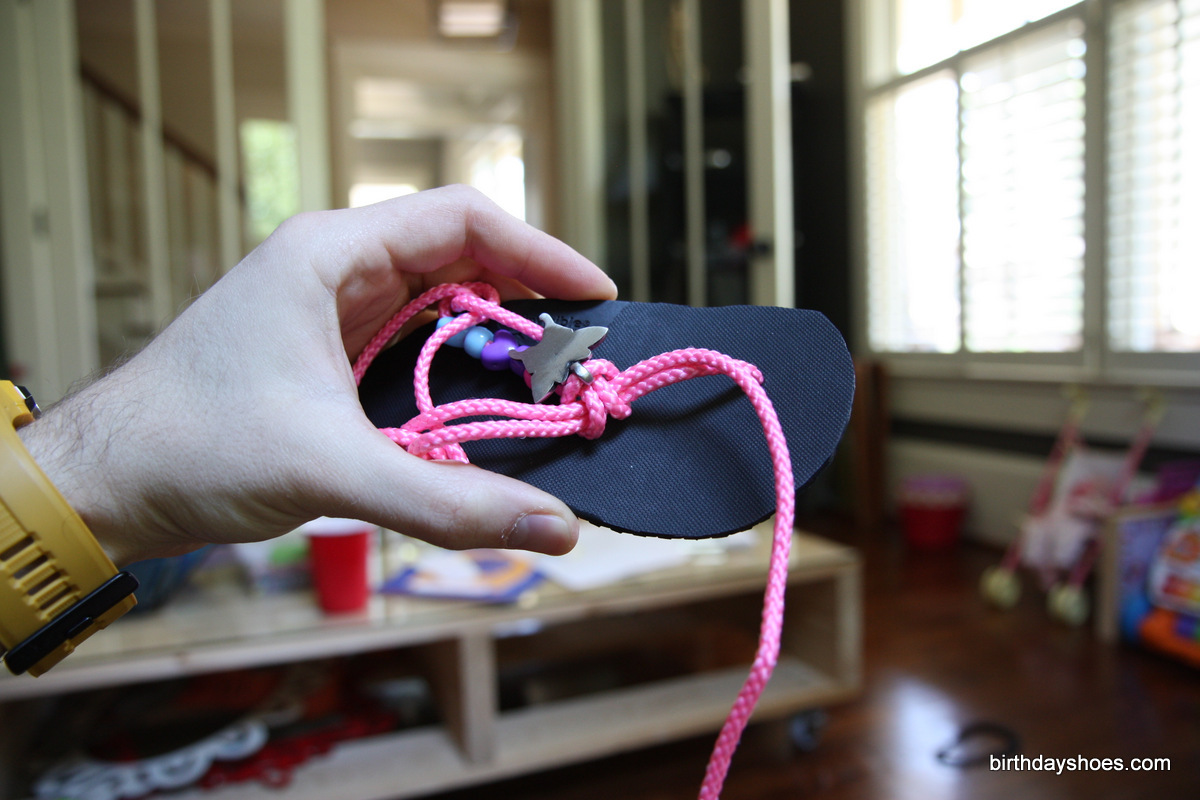
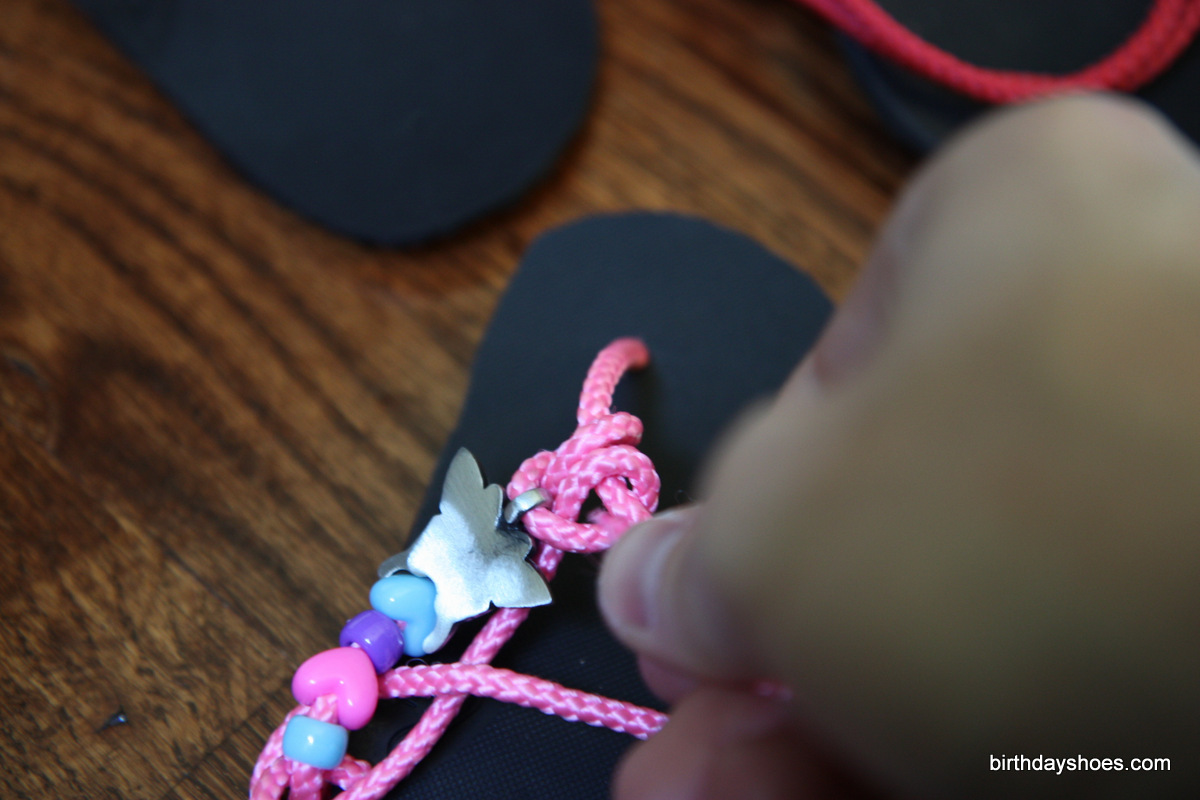
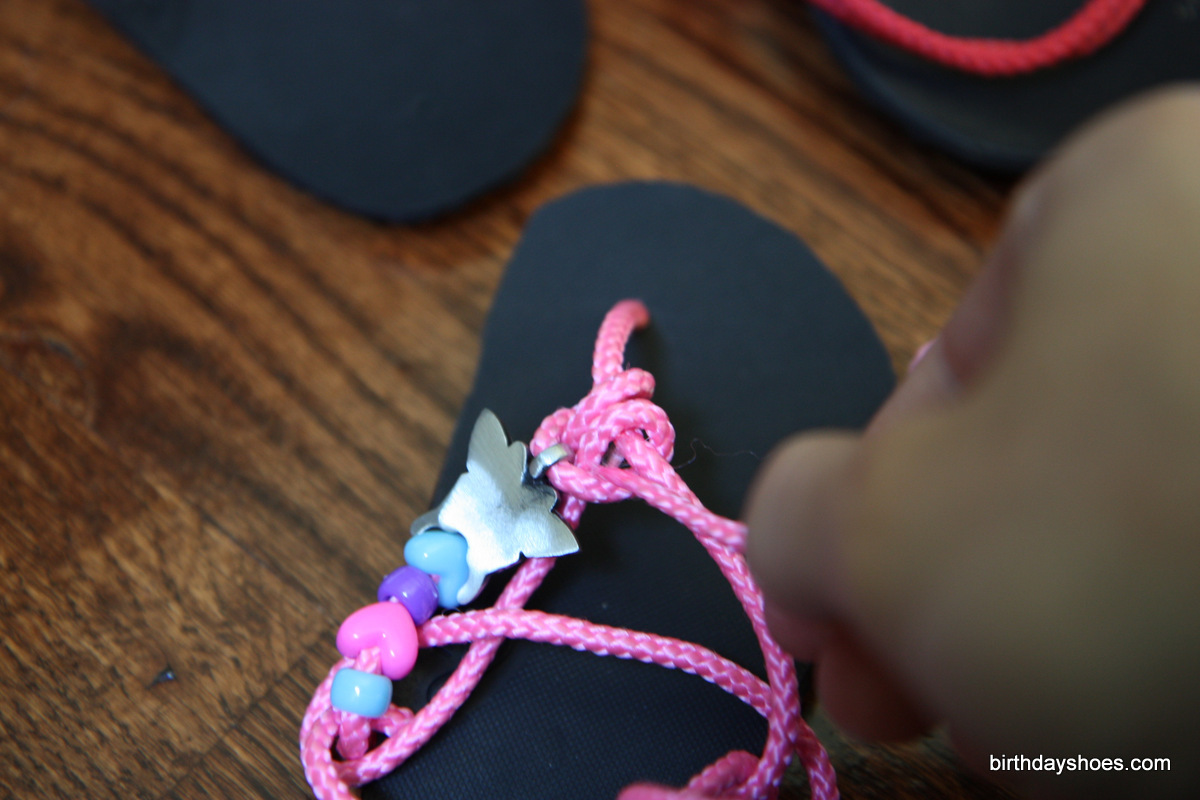
- If you want a charm dangling off the main knot of your kids' huaraches, I suggest sticking it where you main knot is. So look at this picture and imagine a pendant on it. You know, like this. Now make it so!
- What's almost impossible to explain verbally (or just not worth the effort when pictures suffice) is how to run the laces back in reverse from the main knot back to the 9 o'clock position, around the first lacing (not back through the hole), around the heel to the 3 o'clock position, around the lace, and then "home" to the main knot. The pictures above should take you through this journey. You'll see that it was here where beads were added as the sandals could accommodate them.
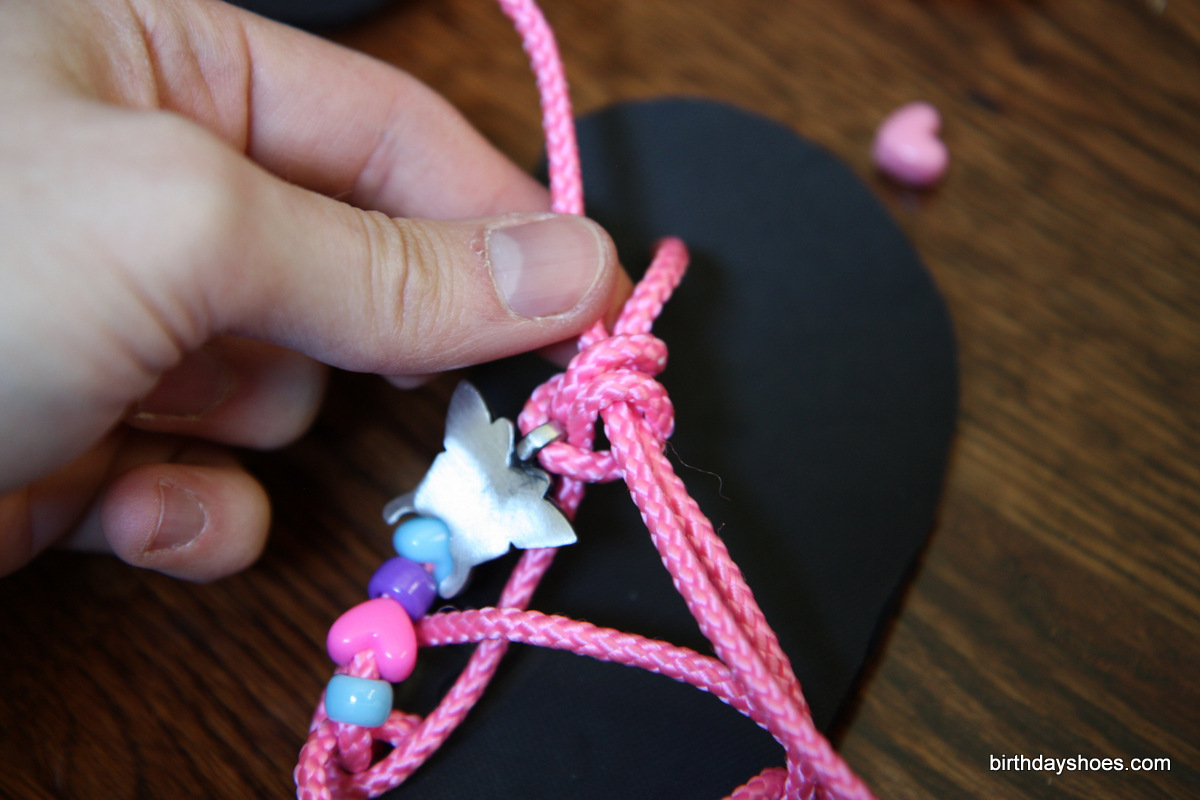
- Don't worry about messing up here — while lacing can be a bit scary, just play with it until it works. The main thing is try to keep the laces parallel to each other as they transition from each point on the clock (so you want your laces at your heel, for example, to be parallel as they wrap the heel). You're almost certainly going to wonder if you're doing this right and the beauty is that even if you are, you probably won't know it, and you can always change it, re-lace, tweak etc. Be patient with yourself!
- Once you've made it back "home," you can loosen your main knot and run the thread through the resulting "tunnel" to ultimately tie off the excess thread. Follow that journey via these pictures: 1 2 3 4.
- You're going to have some excess lace. That's ok! Before you get to cutting the excess, now's a great time to have your kiddo try them on for size.
Step 5: Tweaking, Finished, and Happy!
The end knots seen above were ultimately tweaked a bit and I think I trimmed a little more thread off. But you get the idea!
Now that your kid is able to put the huaraches on, work to get an even tension on the laces for their feet. What you ultimately want is the ability to slip the heel laces down so that your child can take off each sandal just like you'd take off a pair of flip-flops. The difference, obviously, is that with the slip-on/off huaraches tying style, once you slip your foot forward fully into the huaraches, you just pull up the heel laces above the hump of your heel at which point the total tension of the sandals will be enough to "lock" onto your foot.
Once you feel reasonably comfortable with the fit, you can tie a knot at the "home base" of the sandal to keep everything in place. This knot is somewhat up to you and your aesthetic. Just make sure it's not too loose as you don't want it coming undone! You can then cut off any excess lace and "melt" the end to prevent any unraveling.
You're done! Well, you may have to tweak the fit further as the sandals get some use. Nylon doesn't really break in or stretch, so there's not much of an issue there, but if you see something not working quite right (the huaraches are too loose so they fall off) just tweak the lacing by following it back through the various steps until it works. You'll get it just be patient.
The great news is that once it's all dialed in, you really never have to touch it again. Avi's have been put to some serious use for weeks with zero tweaks since my intial foibles — I had a too loose huarache whereby I had to tighten up the heel.
That's it! You just made your kid a pair of shoes!
If that's not worth a few high fives as well as a beaming spouse, well I don't know what is. If you're a little intimidated by this project, well, don't be. It's a hard thing to mess up and the reward for doing it is huge. Your kid will be proud to have helped make their own footwear. You'll be proud to broadcast to friends, family, and strangers that you helped make your kid's shoes — and not just any shoes, but shoes that are healthy and functional! And what more, you'll now be that much more capable of making footwear on the fly — you never know when you might need a good pair of minimalist sandals! And while we used Xero Shoes' kits (thanks Steven for providing them!), you can really make huaraches from anything. But for the money, the Xero DIY kits are fantastic. Go here to get started.
Questions or comments? Did I omit anything in the instructions? Need further clarity? Hit me up in the comments and I'll do my best to help! And please let me know if you found this guide helpful! Tweet about it or share it on facebook or Google+ (see links below).
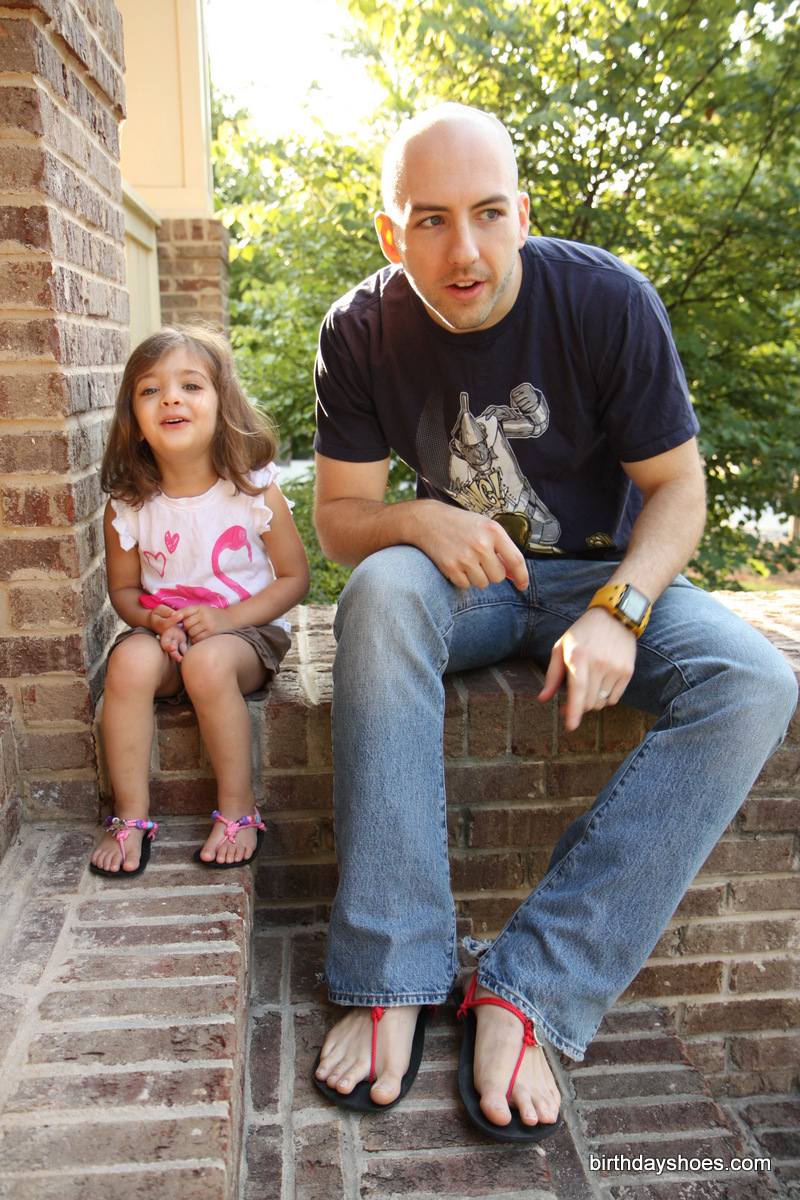
Avi and me both wearing our Xeros. I don't think she really cared about all the benefits of being closer to barefoot, but I kept talking about them, anyway.
- Ted has since launched his own line of premium huaraches sandals — Luna Sandals — to help sate the demand for this fantastic, time-tested minimalist footwear.
NOTE ON NAME CHANGE FROM INVISIBLE SHOES TO XERO SHOES! Summer of 2012 brought with it a re-branding and name change (and logo change) for Invisible Shoes — they changed to XERO SHOES.