Over the course of the past few months, a number of VFF and Birthday Shoes fans have asked if I could create some barefoot or VFF paraphernalia. It is in this spirit, and in a humble request for support for the proprietor of this site (me), that I crea…
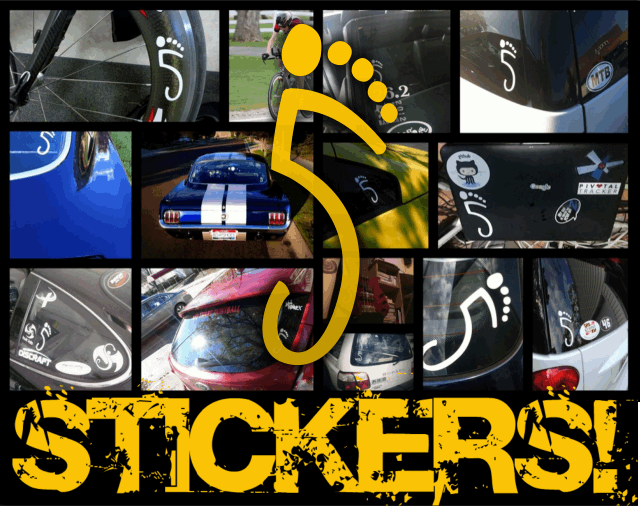
It’s easy to support BirthdayShoes.com and show your interest in healthy foot behaviors — buy some stickers! I’m talking about custom vinyl-cut stickers of the site logo — the 5 with the 5 toes on top seen above. These stickers are high-quality, will match any color window because they’re white, and don’t fuss with unnecessary words — plus they’re likely to add 5hp to your vehicle (no, not really).
For $5 you get 2 mailed to you. You can’t go wrong. Order now:
All proceeds go towards making this site a viable, ongoing exercise in obsessions with minimalist footwear. What you say? Well, believe it or not, BirthdayShoes.com is maintained in spare moments—it’s not my dayjob! Meanwhile, any given review can take upwards of 5-10 hours to write, refine, photo, etc. It’s a lot of work to keep all this up, in other words, so any support is hugely appreciated. And you get something out of it, too. Thanks!Want more? International? Want to see more photos? You’ll want to read on below …
Lots more info on the stickers including use-case photos and more buying options!
I’m pleased to release the BirthdayShoes.com 5 Toes Barefoot Logo sticker Part Deux! And this time, it’s in die-cut vinyl, thus the-sticker-is-the-logo-and-nothing-more-(yeah-that’s-minimalist-for-ya)! These five-toed 5s are made out of high quality vinyl that is weather, scratch and sun proof; they are suited for outdoor use and will likely survive whatever weather can be thrown at it for the next hundred years. Boom!
If you want to get one or more of these stickers, I’ve set up the following options through PayPal. For $3.00 (sans tax, shipping by USPS included) you’ll get one sticker; for $5 you get 2; and for $10 you get 5 stickers. Living on the edge and picking up FIVE stickers means you get:
one for your car
one for your significant other’s car! (surprise, honey!)
one for your laptop
one for your friend — the one you convinced that the barefoot running thing was the real deal
and one in case of emergency.
All proceeds from sticker sales go toward maintaining the ongoing operations of BirthdayShoes.com, so if you don’t even care that much about the sticker, just look at this as a donation to say “I appreciate what you’re doing with this site and hope to see more news, reviews, and user stories going forward!”
Here’s an “action shot” of one BirthdayShoes fan’s (UberC5!) use of the sticker:
UberC5 shows off the BirthdayShoes logo sticker … or maybe he’s showing off his sweet ride. I can’t be sure!
Get the BirthdayShoes 5-toed-5 barefoot logo vinyl sticker!
If you want more than 5, please contact me at justin at birthdayshoes.com.
Now shipping internationally! Just do me a favor and order 5 ($10) to help cover the higher shipping costs.Disclaimer: Neither the “5 foot logo” nor birthdayshoes.com are affiliated with Vibram or Vibram Five Fingers!
(user submitted sticker photos above! Send yours to justin at birthdayshoes.com!)
Okay, I’ve gotten my stickers! What are these things and how do I apply them?
If you’ve never applied a die cut vinyl sticker, then what you get in the mail may throw you for a loop, but it’s really quite simple. Basically, the sticker is sandwiched between two bits of paper. One piece has a wax paper-like translucence and the other is more of a card stock. The way these work is that you peel off the hard card stock first, leaving the sticker stuck to the flimsier wax-like paper; then, you apply that entire thing to whatever surface you want the sticker to be on. Rub it on there good, sticking the entirety of paper and vinyl sticker firmly to the surface; then peel back the wax-like paper and voila, the vinyl sticker will be left in all it’s glory!
Like this:
Since verbal explanations and even a picture montage just don’t fully convey how this works (and how easy it is), here’s a video demonstration of what I just said above, completed in one take and shot one-handed (while I apply the sticker to a laptop case):
Still have questions? Just comment below!
Finally, as a way to kick this off, the first ten tweets on this post get a free sticker (just make sure you mention @bdayshoes and link to this post!).
By Justin
Justin Owings is a deadlifting dad of three, working from Atlanta. When he's not chasing his three kids around, you'll find him trying to understand systems, risk, and human behavior.
I bought the original yellow ones and cut the emblem out…don’t have to do that with these, so I ordered me 5!!!!
I got a couple of these with my sticker order! (3) They are awesome, mine and my boyfriends cars are plastered with them! Ha, thanks Justin!
Okay I ordered my stickers like 12 seconds ago……why don’t I have them yet?
Seriously–
Sweet stickers Justin Thank-you!!
I have mine. If you ever see a Blue Honda CRV 2002 cruising around Seattle/Redmond area then that would be me!
I was surprised to get them from Justin when I ordered my stickers in late October. Happy that my pics made the site!
I’d be very interested in getting my hands on some of these! I live in France though…
What are the dimensions of the stickers?
Jeff,
They are 5″ x 2″ (approximately)
thanks mate for the stickers! rocking it with pride on my Lexus IS
Thanks Justin. They look great.
I swore I would never put any kind of stickers on my 350z – until now! Thanks, Justin!
These look great. Nice job Justin.
I will have to order a couple of these. Any plans to offer them with the website address like the old yellow ones had?
This would make an awesome cell phone skin!
How easily do they come off? I’m probably going to be putting it on glass.
How long does it take to receive them?
@Ashley,
Depends on where you are located, but they mail by USPS and it seems that they usually arrive within 5 days or so. They always mail within 24 hours (assuming it’s not a weekend) of any order being placed.
Justin
Hey guys,
I was thinking about buying a hydration pack and sticking one of these on it. Do you think it would stick? Thanks.
Just noticed my Subi made the site! BOOYA! Now I need one in black so I can put it on my banjo.
In for 2.
Thanks.
Hi, do these come in more sizes? I want to stick it on my nalgene 32oz. Do you think the decal will fit? They seem kind of big.
Should fit on a Nalgene fine.
Hello Justin, I just wrote an article on my blog about how i appreciate my Five Fingers KSO TREK and KSO. I embeded your beginners guide on my site and hope people will enjoy it. It is a really good written guide that i refer to everyone. Have a nice day.
Kind regards,
Giovanni Baele
Got my 5. Two on my Subaru alone – one on each side of the rear hatch window. And when the girlfriend finally gets her new car then at least one will be going on there, too! Thanks!!! 🙂


31 replies on “BirthdayShoes 5 Toed Fives Barefoot Stickers”
Those look great!
Super cool! This will look awesome on the back of my Jeep! 🙂 Thanks for all you do to promote barefeet!
Nice one Justin, If these are half as good as the originals they will be awesome.
Dave
Hi! Do these only come in white? Thank you.
Leslie
Can I get one in orange for my car?
http://macnugget.org/photos/msrh201004/IMG_16788
Nice! Tweeted.
@leslie and nugget,
Only available in white!
I bought the original yellow ones and cut the emblem out…don’t have to do that with these, so I ordered me 5!!!!
I got a couple of these with my sticker order! (3) They are awesome, mine and my boyfriends cars are plastered with them! Ha, thanks Justin!
Okay I ordered my stickers like 12 seconds ago……why don’t I have them yet?
Seriously–
Sweet stickers Justin Thank-you!!
I have mine. If you ever see a Blue Honda CRV 2002 cruising around Seattle/Redmond area then that would be me!
I was surprised to get them from Justin when I ordered my stickers in late October. Happy that my pics made the site!
I’d be very interested in getting my hands on some of these! I live in France though…
What are the dimensions of the stickers?
Jeff,
They are 5″ x 2″ (approximately)
thanks mate for the stickers! rocking it with pride on my Lexus IS
Thanks Justin. They look great.
I swore I would never put any kind of stickers on my 350z – until now! Thanks, Justin!
These look great. Nice job Justin.
I will have to order a couple of these. Any plans to offer them with the website address like the old yellow ones had?
This would make an awesome cell phone skin!
How easily do they come off? I’m probably going to be putting it on glass.
How long does it take to receive them?
@Ashley,
Depends on where you are located, but they mail by USPS and it seems that they usually arrive within 5 days or so. They always mail within 24 hours (assuming it’s not a weekend) of any order being placed.
Justin
Hey guys,
I was thinking about buying a hydration pack and sticking one of these on it. Do you think it would stick? Thanks.
Just noticed my Subi made the site! BOOYA! Now I need one in black so I can put it on my banjo.
In for 2.
Thanks.
Hi, do these come in more sizes? I want to stick it on my nalgene 32oz. Do you think the decal will fit? They seem kind of big.
Should fit on a Nalgene fine.
Hello Justin, I just wrote an article on my blog about how i appreciate my Five Fingers KSO TREK and KSO. I embeded your beginners guide on my site and hope people will enjoy it. It is a really good written guide that i refer to everyone. Have a nice day.
Kind regards,
Giovanni Baele
Got my 5. Two on my Subaru alone – one on each side of the rear hatch window. And when the girlfriend finally gets her new car then at least one will be going on there, too! Thanks!!! 🙂